I have always loved the movie Rudolph the Red Nosed Reindeer and even more so now that my son shares this love too! I have been dying to try to sculpt my favorite characters and now that I saw the perfect way to display my characters I’m giving it a shot.
The Bumble is near and dear to me because when my son was two and we watched the movie he would always run and hide behind the couch whenever the Bumble appeared on the screen! It was so adorable and now that he’s a little bit older he loves the Bumble too.
MATERIALS NEEDED:
- Sculpey modeling clay
- Aluminum foil
- Blue acrylic paint
- White acrylic paint
- Gray acrylic paint
- White doll hair (I purchased a Santa ornament with a flowy beard at the dollar store)
- Hot glue sticks
TOOLS NEEDED:
- Sculpting tools (Darice 11-Piece Clay Cleaning Tool )
- Scissors
- Glue gun
- Sculpey ABB02 Bake and Bond Sculpey Oven Bake Clay (Sculpey Artist Set: 2-Ounce Bake & Bond Bakeable Adhesive for Oven-Bake Clay, 1-Ounce Clay Softener, 1-Ounce Gloss Glaze)
- Shape some aluminum foil for the torso and cover with modeling clay and then sculpt the pecks using a scraping tool.
- Next shape aluminum foil into the desired size and shape for his head. Use the bake and bond to add a small roll of clay to the face and add more to the top of it then create a triangle shape to lay over it creating the nose. Attach the nose by smoothing the clay on the edges with the side of the needle tool and your fingers; to shape the nostrils better if needed after attaching the nose use the needle tool.
- Add bake and bond to the side of the head where you plan to attach it to his body, smoothing the clay from the head to the body with the sides of your sculpting needle and fingers.
- Shape more aluminum foil for the arms and cover with modeling clay. Add more bake and bond where you intend to attach the arms and attach same way you did for the head.
- Shape more aluminum foil for the legs and feet making sure that they are flat enough to allow him to stand once completed and cover with modeling clay. Shape the toes by using the cutting tool and smooth out the ends with your fingers.
- Use the scraping tool to shape the eyes by scraping around and outward then smoothing out with the sides of a tool or your fingers. Use the crescent shape tool to create the under eye circles.
- Roll pointy fingers, add bake and bond, press on top of each other gently, roll a ball adding more bake and bond and gently press on top.
- Add bake and bond to the ends of the arms and attach the hands to the arms in the same way as the other pieces.
- Roll two pieces of clay out thin and cut with an exacto knife to make the edges sharp and shape into a half circle shape for the teeth.
- Bake the teeth in oven for about 5 minutes, allow to cool down and add to the mouth.
- Bake the bumble for 15 minutes.
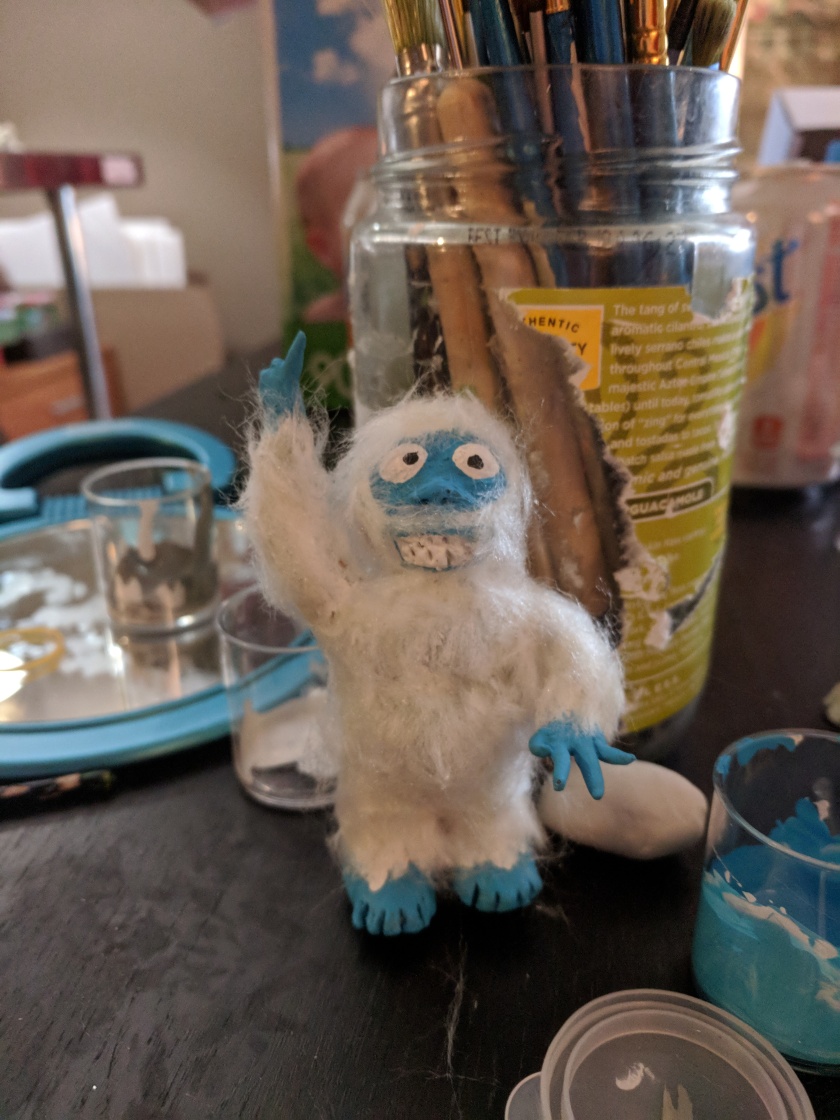
- Once cooled, paint him white with gray accents on the arms, legs, body and head. Paint the teath and eyes white.
- Paint the hands and face blue.
- Paint the Iris black.
- After all of the paint is dry cut short strips of white hair. Lightly coat areas with hot glue and allow to cool slightly before pressing hair into place. Repeat layers as needed, gently rub to remove any hair that may be glued into place.


All that is left to do is make Yukon Cornelius, Hermis, Rudolph, Santa! Once they’re all complete I create my dollar store snowman display with each scene from the movie for you all to see. Merry Christmas and happy crafting! 🎄🎅🦌

2 thoughts on “Mini Sculpting: The Bumble”